In different articles here, we’ve shown you the parts that make up a professional invoice, how invoices have evolved into what they are right now, and how to resolve disputes that may arise when sending invoices to your customers.
Today, we will be showing you in a step-by-step framework how to create an invoice from scratch on Workstedi and send it to your customers or keep it for record purposes… in just 5 minutes.
- Sign up, follow the prompts and instructions to verify your account, and then fill in the basic details in your profile. You should see a display similar to this. Click the large, orange button with the CTA “Create New Invoice“.
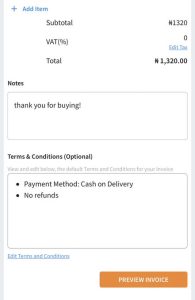
 This action will take you to the “Invoice Creation” page. Here, you can input: your company logo, customer information, items/goods/service for sale, item image, quantity, cost of the item/good/service, and terms & conditions both parties should agree to. Ensure you click on “done” at every point where you update information about any of these into their respective fields.
- Now that all your information is in, you can get a preview of your invoice to see if you like it and ensure there are no errors. To check your preview, scroll to the bottom of the page, and click “Preview Invoice“.

- If you like what you see, you’ve double-checked it, everything is in place, and you’re ready to create, click the “Create Invoice” button in the bottom right of your screen.

And voila! Your invoice is now ready and you can send it to customers and clients for your services and products.


